
general post
Configure SPF, DKIM, DMARC for Better Email Deliverability
Tired of your important emails landing in spam? Discover how simple it is to configure SPF, DKIM, and DMARC to secure your sender reputation and ensure your messages always reach their intended audience.

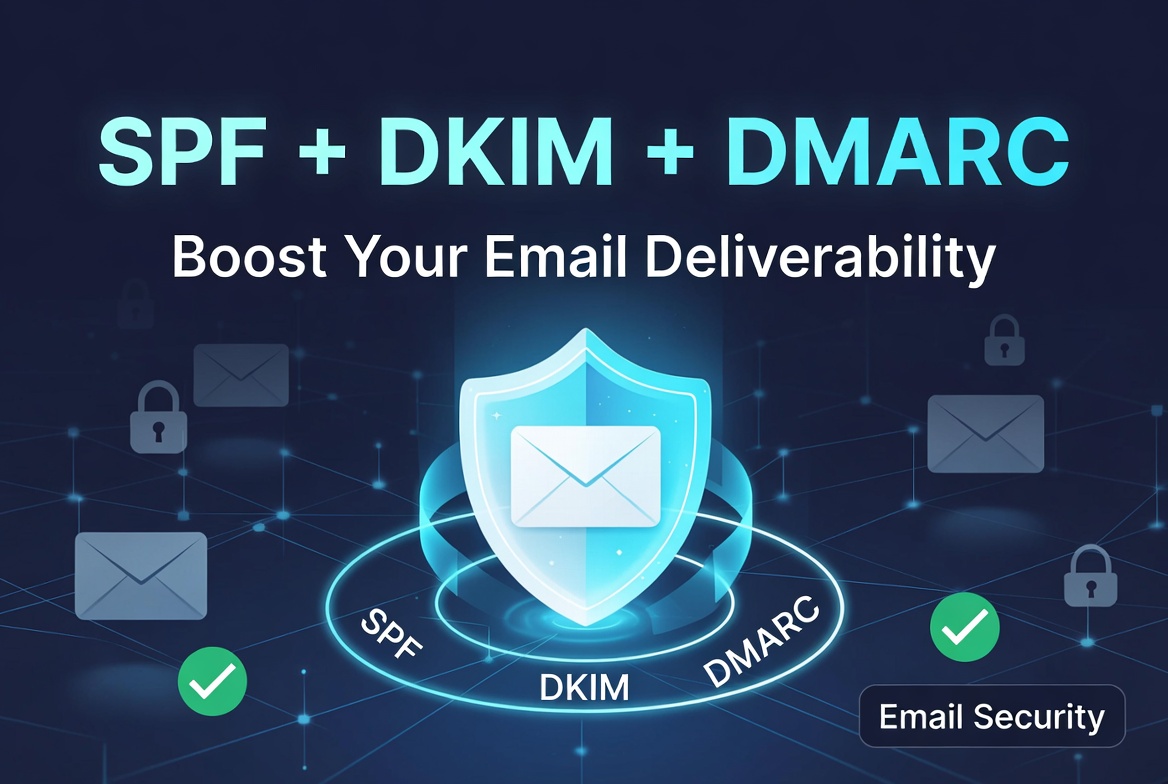
How to Configure SPF, DKIM, and DMARC for Better Email Deliverability
In today’s digital landscape, email remains the backbone of communication for businesses, organizations, and individuals worldwide. From marketing campaigns and transactional notifications to critical internal communications, the ability to reliably deliver emails directly to the recipient’s inbox is paramount. However, the ever-increasing sophistication of spam filters and the persistent threat of phishing and spoofing attacks make achieving high email deliverability a constant challenge.
This is where SPF, DKIM, and DMARC come into play. These three interconnected email authentication protocols are the industry standard for verifying the legitimacy of email senders, protecting your domain from unauthorized use, and significantly improving your email deliverability rates. Without them, your emails risk being flagged as spam, rejected outright, or worse, used by malicious actors to impersonate your brand.
This comprehensive guide will walk you through what SPF, DKIM, and DMARC are, how they work, and provide step-by-step instructions on how to configure them for your domain. By the end, you’ll have a clear understanding of how to implement these crucial protocols to safeguard your email reputation and ensure your messages reach their intended audience.
Understanding Email Deliverability Challenges
Before diving into the solutions, it’s important to grasp the common hurdles email senders face:
- Spam Filters: These automated systems, employed by email providers like Gmail, Outlook, and Yahoo, analyze incoming emails for various indicators of spam. These indicators can range from suspicious content and attachments to the sender’s reputation and, crucially, the absence of proper authentication.
- Phishing and Spoofing: Malicious actors frequently attempt to impersonate legitimate organizations (spoofing) to trick recipients into revealing sensitive information (phishing). They do this by forging the “From” address to appear as if the email originated from a trusted source. This not only harms recipients but also severely damages the reputation of the legitimate brand being impersonated.
- Blacklisting: If your domain or IP address is associated with sending spam or malicious emails, it can end up on blacklists maintained by various organizations. Being blacklisted means your emails will be automatically rejected by many email providers, regardless of their content.
- Loss of Trust and Revenue: When your emails consistently land in spam folders or are rejected, it leads to missed opportunities, poor customer engagement, and a damaged brand image. For businesses, this translates directly into lost leads, reduced sales, and diminished customer trust.
SPF, DKIM, and DMARC are designed to combat these challenges by providing a robust framework for email authentication, allowing recipient servers to verify the sender’s identity and the integrity of the message.
Deep Dive into SPF (Sender Policy Framework)
SPF is an email authentication method designed to detect sender address forgery. It allows domain owners to publish a list of authorized mail servers that are permitted to send email on behalf of their domain.
What is SPF?
At its core, SPF is a DNS TXT record that specifies which IP addresses and mail servers are authorized to send email from a particular domain. When an email server receives an email, it checks the sender’s domain’s SPF record to verify if the sending server’s IP address is on the authorized list.
How SPF Works
- Sending Email: When you send an email from
yourdomain.com, your mail server uses its IP address to connect to the recipient’s mail server. - Recipient Server Check: The recipient’s mail server extracts the domain from the email’s “MAIL FROM” address (also known as the envelope sender or return-path address). It then performs a DNS lookup to find the SPF record for
yourdomain.com. - IP Address Verification: The recipient server compares the IP address of the sending mail server with the list of authorized IP addresses and hostnames specified in the SPF record.
- SPF Result: Based on this comparison, the recipient server determines an SPF result:
- Pass: The sending IP is authorized.
- Fail (
-all): The sending IP is not authorized, and the email should be rejected. - Softfail (
~all): The sending IP is not explicitly authorized, but the recipient server should accept the email, though it might be marked as suspicious. - Neutral (
?all): The domain owner makes no statement about whether the IP is authorized. - None/TempError/PermError: SPF record not found or has syntax errors.
Configuring SPF
SPF records are published as TXT records in your domain’s DNS settings. A domain can only have one SPF record.
SPF Record Syntax Breakdown
An SPF record starts with v=spf1 followed by a series of mechanisms and modifiers.
v=spf1: Specifies the SPF version (alwaysspf1).- Mechanisms: Define which hosts are allowed to send email.
ip4:192.0.2.1: Authorizes a specific IPv4 address.ip6:2001:db8::1: Authorizes a specific IPv6 address.a: Authorizes the IP addresses resolved by the domain’s A records.mx: Authorizes the IP addresses resolved by the domain’s MX records.ptr: (Discouraged due to performance and security issues) Authorizes a host if its PTR record maps back to the sending domain.include:thirdparty.com: Authorizes servers specified inthirdparty.com’s SPF record. This is crucial for third-party email services (e.g., Google Workspace, Mailchimp, SendGrid).exists:example.com: Authorizes ifexample.comresolves to an A record.
- Qualifiers (Prefixes): Determine how the recipient server should treat a match.
+(Pass): Default if no qualifier is specified.+mxis the same asmx.-(Fail): Hard fail. The email should be rejected. Use this if you are confident all legitimate senders are covered.~(Softfail): Soft fail. The email should be accepted but marked as suspicious. Good for initial deployment or if you’re not entirely sure all senders are covered.?(Neutral): Neutral. The email should be accepted. Use this only for testing or if you don’t want to make a strong statement.
allMechanism: This is the most important mechanism and should always be the last one in your SPF record. It specifies the policy for any sender not matched by previous mechanisms.-all(Hard Fail): Any server not explicitly listed is unauthorized. This is the strongest and recommended policy once you’re confident in your SPF record.~all(Soft Fail): Any server not explicitly listed is unauthorized but treated with a soft fail. Good for initial deployment.?all(Neutral): Any server is allowed. This offers no protection and should generally be avoided.
Example SPF Record
Let’s say your domain yourdomain.com uses Google Workspace for its primary email, and Mailchimp for marketing emails.
v=spf1 include:_spf.google.com include:servers.mcsv.net ~all
Explanation:
v=spf1: Standard SPF version.include:_spf.google.com: Authorizes Google’s mail servers.include:servers.mcsv.net: Authorizes Mailchimp’s mail servers.~all: Specifies that any other sending server not listed should result in a soft fail. You might change this to-allonce you are certain all legitimate senders are covered.
Important Considerations for SPF
- One SPF Record Per Domain: You can only have one TXT record starting with
v=spf1for a given domain. If you have multiple services, you must combine theirincludemechanisms into a single record. - 10 DNS Lookup Limit: SPF records have a limit of 10 DNS lookups for
a,mx,ptr,exists, andincludemechanisms. Exceeding this limit will cause SPF to return aPermError, effectively failing authentication. Be mindful of nestedincludestatements. - Testing Tools: Use online SPF validation tools (e.g., MXToolbox SPF Checker, SPF Surveyor) to check your record’s syntax and lookup count.
- Updates: Whenever you add or remove an email sending service, remember to update your SPF record accordingly.
Deep Dive into DKIM (DomainKeys Identified Mail)
DKIM provides a way for an organization to cryptographically sign outgoing emails, allowing recipient servers to verify that the email was indeed sent by the domain owner and that its content hasn’t been altered in transit.
What is DKIM?
DKIM uses public-key cryptography to add a digital signature to outgoing emails. This signature is generated using a private key held by the sender’s mail server. The corresponding public key is published in the domain’s DNS records. Recipient servers retrieve this public key to verify the signature.
How DKIM Works
- Key Generation: The sending domain generates a pair of cryptographic keys: a private key (kept secret by the sending server) and a public key.
- DNS Publication: The public key is published as a TXT record in the domain’s DNS, typically under a subdomain specific to a “selector” (e.g.,
s1._domainkey.yourdomain.com). - Email Signing: When an email is sent, the sending mail server uses its private key to create a unique digital signature for specific parts of the email (headers like
From,Subject,Date, and often the message body). This signature is added as aDKIM-Signatureheader to the email. - Recipient Server Verification:
- The recipient server receives the email and sees the
DKIM-Signatureheader. - It extracts the domain and selector from the
DKIM-Signatureheader. - It performs a DNS lookup to retrieve the public key associated with that selector and domain.
- Using the public key, the recipient server attempts to decrypt the signature and verify that it matches the email’s content.
- The recipient server receives the email and sees the
- DKIM Result:
- Pass: The signature is valid, and the email has not been tampered with.
- Fail: The signature is invalid, indicating tampering or an incorrect key.
- None/Neutral: No DKIM signature found or the record is malformed.
Configuring DKIM
Unlike SPF, which authorizes sending IPs, DKIM authenticates the email itself. Each email sending service you use (e.g., Google Workspace, Mailchimp, Salesforce) will typically provide you with specific DKIM records to publish.
Generating DKIM Keys
You generally don’t generate DKIM keys manually. Your email service provider (ESP) or mail server software will generate the key pair for you. They will then provide you with the public key, which you need to publish in your DNS.
Publishing the DKIM Record
DKIM records are published as TXT records in your DNS. The record name usually follows the format selector._domainkey.yourdomain.com.
- Selector: A unique identifier chosen by your ESP (e.g.,
google,k1,s1). It allows you to have multiple DKIM keys for different sending services or for key rotation. _domainkey: A fixed subdomain used for DKIM records.
The value of the TXT record will contain the public key and other parameters.
Example DKIM Record (for Google Workspace):
Google Workspace typically provides two CNAME records for DKIM. If they provide a TXT record, it might look like this:
Host/Name: google._domainkey
Type: TXT
Value: v=DKIM1; p=MIGfMA0GCSqGSIb3DQEBAQUAA4GNADCBiQKBgQDqX...[long string of characters]...QIDAQAB
Explanation:
Host/Name:google._domainkeyis the selector (google) followed by_domainkey.Type: TXT (though some providers might use CNAMEs that point to their own DKIM records).Value: Containsv=DKIM1(DKIM version) andp=followed by the public key.
Important Considerations for DKIM
- Multiple DKIM Records: You can (and often should) have multiple DKIM records for a single domain, each with a different selector, corresponding to different email sending services.
- Key Rotation: It’s good security practice to rotate your DKIM keys periodically. Your ESP will usually guide you through this process.
- Testing Tools: Use online DKIM validation tools (e.g., MXToolbox DKIM Checker) to ensure your records are correctly published and valid.
- Subdomains: If you send email from subdomains (e.g.,
marketing.yourdomain.com), you may need separate DKIM records for those subdomains, depending on your ESP’s configuration.
OpenAI Founders’ Journey: Vision, Innovation, and AI Breakthroughs
Elon Musk’s AI & Blockchain Influence: Lessons for Builders 2026
Venture Capital vs ICO: Which Funding Is Best for Blockchain Projects?
Deep Dive into DMARC (Domain-based Message Authentication, Reporting & Conformance)
DMARC builds upon SPF and DKIM, providing a policy layer that tells recipient servers what to do with emails that fail SPF or DKIM authentication. Crucially, it also provides reporting back to the domain owner about email authentication results.
What is DMARC?
DMARC is an email authentication protocol that uses SPF and DKIM to determine the authenticity of an email. It allows domain owners to:
- Specify a policy: Tell receiving mail servers how to handle emails that fail authentication (e.g., quarantine, reject, or do nothing).
- Request reports: Receive aggregate and forensic reports on email authentication results, giving insights into who is sending email on behalf of your domain, both legitimately and maliciously.
How DMARC Works
- SPF and DKIM Check: A recipient server first performs SPF and DKIM checks on an incoming email.
- DMARC Alignment Check: DMARC introduces the concept of “alignment.” For an email to pass DMARC, not only must SPF and/or DKIM pass, but the domain used in the “From” header (the one visible to the user) must “align” with the domain checked by SPF or DKIM.
- SPF Alignment: The domain in the “From” header must match the domain in the “MAIL FROM” (envelope sender) address used for SPF checking.
- DKIM Alignment: The domain in the “From” header must match the “d=” tag domain in the DKIM signature.
- Alignment can be “strict” (exact match) or “relaxed” (subdomain allowed).
- Policy Application: If an email fails DMARC (i.e., both SPF and DKIM fail to align or pass), the recipient server applies the policy specified in the domain’s DMARC record.
- Reporting: The recipient server sends DMARC reports (aggregate and/or forensic) to the email addresses specified in the DMARC record.
Configuring DMARC
DMARC records are published as a TXT record in your domain’s DNS, specifically under the _dmarc subdomain.
DMARC Record Syntax Breakdown
A DMARC record starts with v=DMARC1 and includes several tags:
v=DMARC1: Specifies the DMARC version (alwaysDMARC1).p: Policy for your domain. This is the most critical tag.p=none: Monitor mode. No action is taken on failing emails, but reports are still sent. Essential for initial deployment.p=quarantine: Emails failing DMARC should be treated as suspicious (e.g., moved to spam).p=reject: Emails failing DMARC should be rejected outright. This is the strongest policy.
pct: Percentage of emails to apply the policy to. (e.g.,pct=20means 20% of failing emails will be affected). Useful for gradual rollout ofquarantineorrejectpolicies. Default is 100.rua: Reporting URI for Aggregate reports. Specifies an email address to send daily aggregate reports (XML format) to. Example:rua=mailto:dmarc_reports@yourdomain.com.ruf: Reporting URI for Forensic reports. Specifies an email address to send individual forensic reports (more detailed, often triggered by specific failures). Example:ruf=mailto:dmarc_forensic@yourdomain.com. Use with caution as these can contain sensitive information and generate a lot of volume.adkim: Alignment mode for DKIM.adkim=s(Strict): The “From” domain must exactly match the DKIM “d=” tag domain.adkim=r(Relaxed): The “From” domain can be a subdomain of the DKIM “d=” tag domain. (Default)
aspf: Alignment mode for SPF.aspf=s(Strict): The “From” domain must exactly match the SPF “MAIL FROM” domain.aspf=r(Relaxed): The “From” domain can be a subdomain of the SPF “MAIL FROM” domain. (Default)
fo: Failure reporting options. Specifies when forensic reports should be generated.fo=0: Generate report if all underlying authentication mechanisms fail. (Default)fo=1: Generate report if any underlying authentication mechanism fails.fo=d: Generate report if DKIM fails.fo=s: Generate report if SPF fails.
sp: Policy for subdomains. (e.g.,sp=quarantine). If not specified, theppolicy applies to subdomains.ri: Reporting interval. How often aggregate reports are sent, in seconds. Default is 86400 (24 hours).
Example DMARC Record
Host/Name: _dmarc
Type: TXT
Value: v=DMARC1; p=none; rua=mailto:dmarc_reports@yourdomain.com; ruf=mailto:dmarc_forensic@yourdomain.com; fo=1;
Explanation:
v=DMARC1: DMARC version.p=none: Policy is set to “none” (monitor mode). No action is taken on failing emails. This is crucial for initial deployment.rua=mailto:dmarc_reports@yourdomain.com: Aggregate reports will be sent to this email address.ruf=mailto:dmarc_forensic@yourdomain.com: Forensic reports will be sent to this email address.fo=1: Forensic reports will be generated if any authentication mechanism (SPF or DKIM) fails.
The DMARC Rollout Strategy (Crucial)
Implementing DMARC with a p=reject policy immediately can disrupt legitimate email flow if your SPF or DKIM records are not perfectly configured. A phased rollout is highly recommended:
- Phase 1: Monitor (
p=none)- Publish a DMARC record with
p=none. - Include
ruaandruftags to receive reports. - Duration: Weeks to months.
- Action: Analyze the aggregate reports daily. Identify all legitimate sending sources (IPs, DKIM selectors) for your domain. Ensure all these sources are correctly covered by your SPF and DKIM records.
- Publish a DMARC record with

general post
Coding Bootcamps vs Computer Science Degrees: Which Offers Better Career Opportunities?

Coding Bootcamps vs Computer Science Degrees: Which Gives Better Career Opportunities?
The tech industry has experienced massive structural shifts over the past decade. The race to build digital infrastructure, software products, and artificial intelligence models has driven high demand for technical talent. Yet, the question of how to enter this lucrative field remains hotly debated.
Two primary educational pathways dominate the software engineering landscape: the traditional four-year Computer Science (CS) Degree and the intensive, accelerated Coding Bootcamp.
Both options promise to equip you with the skills needed to write code, build applications, and land a high-paying job. However, their curricula, financial investments, pedagogical philosophies, and long-term career trajectories are vastly different.
This comprehensive guide analyzes the nuances of coding bootcamps versus computer science degrees to help you determine which pathway provides the best career opportunities for your specific goals, background, and timeline.
The Landscape: Understanding the Two Pathways
Before comparing career outcomes, it is essential to understand what each educational model is designed to accomplish.
+-----------------------------------------------------------------------------------+
|                                 EDUCATIONAL MODELS                                |
+-----------------------------------------------------------------------------------+
|  Computer Science Degree                         Coding Bootcamp                  |
|  -----------------------                         ---------------                  |
|   Duration: 4 Years                              Duration: 3 to 9 Months        |
|   Focus: Theory, Math, Systems                   Focus: Applied Web/App Dev     |
|   Cost: $40,000 - $200,000+                      Cost: $10,000 - $30,000        |
|   Outcome: Broad Foundational Knowledge          Outcome: Job-Ready Portfolio   |
+-----------------------------------------------------------------------------------+
What is a Computer Science Degree?
A Computer Science degree is an academic, multidisciplinary program offered by accredited colleges and universities. It typically spans four years (for a Bachelor of Science) and requires general education courses alongside rigorous study in mathematics, computational theory, and hardware-software interaction.
The primary goal of a CS program is not merely to teach you how to write code in a specific language; it is to teach you how computers work at a fundamental level. You study how data is stored in memory, how operating systems manage resources, how compilers translate syntax into machine code, and how mathematical proofs govern algorithmic efficiency.
Core Curriculum Highlights:
- Data Structures and Algorithms (DSA): Trees, graphs, hash tables, sorting algorithms, algorithmic complexity (Big-O notation).
- Discrete Mathematics & Linear Algebra: Graph theory, logic, combinatorics, matrix transformations
general post
WAEC GCE Registration 2026: Form, Fee, Closing Date & How to Register Online
Get ready to take the next step in your academic journey! Our comprehensive guide simplifies the WAEC GCE Registration 2026 process, ensuring you have all the details on forms, fees, and how to register online with ease. Learn about eligibility, required documents, subject selection, and exam preparation.
The West African Examinations Council (WAEC) General Certificate Examination (GCE) is a crucial opportunity for private candidates seeking to obtain their O’Level certificates. For those looking to advance their academic or professional careers, understanding the complete process for WAEC GCE Registration 2026 is paramount. This comprehensive guide will walk you through every essential detail, from eligibility criteria and required documents to the step-by-step online registration process, fees, and important deadlines. Prepare yourself for a seamless application experience and take a significant step towards achieving your educational goals.
Understanding WAEC GCE Registration 2026
The WAEC GCE is a private examination conducted by the West African Examinations Council. It caters to candidates who are not in the regular school system but wish to obtain an O’Level certificate. The 2026 registration period is a critical window for these individuals to secure their spot. It’s essential to stay informed about the official announcements and guidelines released by WAEC to ensure a successful application for the WAEC GCE Registration 2026. This examination provides a second chance for candidates who may not have performed well in the May/June WASSCE, or for adults who wish to complete their secondary education qualifications for career advancement or further studies.
Who is Eligible for WAEC GCE 2026?
Before you begin your WAEC GCE Registration 2026, it’s important to confirm your eligibility. Generally, candidates must meet the following criteria:
- Age Requirement: Be at least 16 years old at the time of registration. While there’s a minimum age, there is no upper age limit, making it accessible to adult learners.
- Basic Literacy: Possess a basic understanding of the English Language and Mathematics. This is crucial as these are compulsory subjects and the medium of instruction.
- Internet Access: Have access to a computer with internet connectivity for online registration. The entire process, from purchasing pins to printing slips, is digital.
- Financial Readiness: Be prepared to pay the stipulated registration fees. These fees are non-refundable, so ensure you meet all other criteria before payment.
There are no strict academic prerequisites like school attendance, making this examination accessible to a wide range of private candidates across Nigeria and other West African countries. This inclusive approach ensures that anyone with the desire to further their education can do so through the WAEC GCE. It’s particularly beneficial for those who missed out on formal schooling, dropped out, or need to improve specific subject grades for university admission.
Required Documents for WAEC GCE Registration 2026
To ensure a smooth registration process, gather all necessary documents beforehand. While the exact requirements may vary slightly, the following are typically needed for your WAEC GCE Registration 2026:
- Recent Passport Photograph: A clear, recent passport-sized photograph with a white or off-white background. The photo must be taken within the last six months, show your full face without head coverings (unless for religious reasons), and have no shadows. It will be uploaded during the online registration, so ensure it meets WAEC’s specified dimensions (usually 275 x 314 pixels) and file size (typically 15-20 KB) to avoid rejection. Blurry or poorly lit photos are often rejected.
- Valid Means of Identification: This could be a National ID Card (NIN slip), Voter’s Card, Driver’s License, or International Passport. Ensure the details on your ID (especially your name and date of birth) match your registration information precisely. Discrepancies can lead to issues during verification and result collection.
- Birth Certificate: For age verification, if required. It’s always good practice to have this document readily available, especially if there are any questions regarding your age.
- O’Level Result (if applicable): If you are registering to improve previous results, have your previous WAEC, NECO, or NABTEB statement of results handy. This helps in selecting subjects you might need to retake and ensures you don’t inadvertently register for subjects you’ve already passed with good grades.
- Email Address and Phone Number: Active and accessible contact information for communication and verification purposes. WAEC will use these channels to send important updates, your registration details, and potentially your exam timetable. Ensure the email address is one you check regularly and the phone number is active.
- Payment Card/Bank Details: For purchasing the registration pin and paying any associated fees online. Ensure your card is active and has sufficient funds.
Step-by-Step Guide to WAEC GCE Online Registration 2026
The WAEC GCE Registration 2026 process is primarily conducted online. Follow these steps carefully to avoid errors and ensure a successful application:
- Visit the Official WAEC GCE Portal: Navigate to the official WAEC registration portal. It is crucial to ensure you are on the correct website (e.g., www.waecdirect.org or the specific GCE portal link provided by WAEC) to avoid scams and fraudulent sites. Always look for ‘https://’ and a padlock icon in the browser address bar.
- Purchase the Registration Pin: This is usually done through authorized banks (e.g., First Bank, UBA, Zenith Bank, GTBank) or online payment platforms integrated into the WAEC portal. The pin (often called a ‘scratch card’ or ‘e-pin’) is essential to access the registration form and initiate your WAEC GCE Registration 2026. Keep the pin safe and confidential as it’s your key to the portal and usually valid for a single registration.
- Create an Account/Login: If you are a new user, you will need to create an account using your email address and a strong password. Ensure your password is secure and memorable. Returning candidates can simply log in with their existing credentials. You may need to verify your email address after account creation.
- Fill the Online Registration Form: Carefully input all your personal details, including your full name (as it appears on your ID), date of birth, gender, state of origin, local government area, and contact information. Double-check for any typographical errors, as corrections can be difficult and costly later. Pay particular attention to the spelling of your name.
- Upload Passport Photograph: Upload your recent passport photograph according to the specified dimensions and file size. A clear, professional photo is crucial for identification and will appear on your photo card and certificate. Ensure it meets all the requirements mentioned in the ‘Required Documents’ section.
- Select Subjects: Choose your desired subjects. Ensure you select the correct subject codes. Most candidates register for a minimum of 8-9 subjects, including English Language and Mathematics, which are compulsory. Consider your career aspirations and the requirements of your chosen higher institution when making your subject choices.
- Choose Examination Town/Centre: Select your preferred examination town and centre. This is crucial for your convenience during the examination period. Try to choose a centre that is easily accessible to you and confirm its location beforehand. WAEC usually provides a list of available centres.
- Review and Confirm: Before final submission, meticulously review all the information you have provided. This is perhaps the most critical step. Check your name, date of birth, subjects, and examination centre. Any errors after submission may be difficult or impossible to correct without incurring additional charges or delays. This step is vital for a successful WAEC GCE Registration 2026.
- Print Photo Card and Acknowledgement Slip: After successful submission, print out your photo card and acknowledgement slip. These documents are vital for the examination (you will need to present your photo card at the exam hall) and should be kept safe. They serve as proof of your registration and contain your candidate number, subjects, and exam centre details.
WAEC GCE Registration Fees 2026
The registration fee for WAEC GCE 2026 is subject to change based on WAEC’s official pronouncements. It typically covers the examination fee, administrative charges, and the cost of the registration pin. Candidates are advised to check the official WAEC portal for the exact amount as soon as the registration window opens. The fee structure might include a base fee for a certain number of subjects, with additional charges for extra subjects or practical components. Payment methods usually include:
- Bank deposits at designated banks (where you purchase the e-pin).
- Online payment gateways using debit/credit cards directly on the WAEC portal.
Always obtain and keep your payment receipts as proof of transaction. These receipts are important in case of any payment-related discrepancies during your WAEC GCE Registration 2026. Be wary of unofficial agents or websites claiming to offer discounted registration fees, as these are often fraudulent.
WAEC GCE Closing Date 2026 and Important Deadlines
The closing date for WAEC GCE Registration 2026 is one of the most critical pieces of information. WAEC usually provides a specific window for registration, often with an initial deadline and sometimes an extended period with a late registration fee. It is highly recommended to register as early as possible to avoid last-minute rushes, potential technical issues due to server overload, and the stress of a looming deadline. Keep an eye on the official WAEC website and reputable news outlets for precise dates. Missing the deadline means you will have to wait for the next examination cycle, which can significantly delay your academic or career plans.
Key Dates to Remember:
- Registration Commencement Date: The official start date for purchasing pins and accessing the online portal for WAEC GCE Registration 2026. Mark this date on your calendar.
- Normal Registration Closing Date: The deadline for regular registration without penalties. Aim to complete your registration before this date.
- Late Registration Closing Date (if applicable): An extended period, usually with an additional fee. This is a last resort and should be avoided if possible, as it adds extra cost and pressure.
- Examination Dates: The period when the actual GCE examinations will be conducted. Plan your study schedule around these dates, allowing ample time for revision.
- Result Release Date: The approximate time frame for the release of results. WAEC typically announces this after the examinations are concluded.
Subject Selection Guide for WAEC GCE 2026
Choosing the right subjects for your WAEC GCE Registration 2026 is a critical decision that can impact your future academic and career paths. While English Language and Mathematics are compulsory, you typically need to select a minimum of seven to nine subjects in total. Here’s a guide to help you make informed choices:
- Consider Your Career Aspirations: If you have a specific career path in mind (e.g., medicine, engineering, law, business), research the O’Level subject requirements for related university courses. For instance, aspiring engineers will need Physics, Chemistry, and Further Mathematics, while those aiming for medicine will require Biology, Physics, and Chemistry.
- University/Polytechnic Requirements: Different institutions and courses have varying subject prerequisites. Always check the JAMB brochure or the specific university’s admission requirements for your desired course of study. This will ensure your subject combination is acceptable.
- Personal Strengths and Interests: Choose subjects you are good at and genuinely interested in. This will make studying more enjoyable and increase your chances of achieving good grades. Avoid picking subjects just because others are doing them if they don’t align with your abilities.
- Subject Groups: WAEC subjects are broadly categorized into Science, Arts, Commercial, and Vocational. Ensure your combination meets the requirements for your chosen field. For example, a science student might take English, Maths, Physics, Chemistry, Biology, and one or two other electives.
- Avoid Overloading: While it’s tempting to register for many subjects, be realistic about your capacity. It’s better to excel in fewer subjects than to perform poorly in many.
Careful subject selection during your WAEC GCE Registration 2026 is a foundational step towards academic success. Take your time, consult with mentors or career counselors if needed, and make choices that align with your long-term goals.
Tips for a Successful WAEC GCE Registration 2026
To ensure your WAEC GCE Registration 2026 goes smoothly and you are well-prepared for the exams, consider these tips:
- Start Early: Don’t wait until the last minute. Early registration gives you ample time to resolve any issues, select your preferred centre, and avoid the stress of a looming deadline and potential server congestion.
- Read Instructions Carefully: Pay close attention to all instructions on the WAEC portal and registration form. Misreading instructions is a common cause of errors that can invalidate your registration.
- Use a Reliable Internet Connection: A stable internet connection prevents interruptions during the online process, especially when uploading documents or making payments. A sudden disconnection can lead to incomplete registration or payment issues.
- Verify Information: Double-check every detail before submission. Errors in names, dates of birth, or subject choices can lead to disqualification or delays in processing your WAEC GCE Registration 2026 and result collection.
- Keep Records: Print and save all relevant documents, including your photo card, acknowledgement slip, e-pin details, and payment receipts. These are crucial for future reference, especially on examination day and when checking results.
- Prepare Adequately: Once registered, shift your focus to your studies. Utilize past questions, recommended textbooks, and online resources to prepare thoroughly for each subject. Develop a study timetable and stick to it.
- Stay Updated: Regularly check the official WAEC website for any new announcements or changes to the examination schedule, registration process, or guidelines. Subscribe to official WAEC newsletters or follow their verified social media channels.
- Seek Assistance When Needed: If you encounter any technical difficulties or have questions during your WAEC GCE Registration 2026, do not hesitate to contact WAEC customer support or visit a WAEC office. Avoid relying on unverified sources for critical information.
Common Mistakes to Avoid During WAEC GCE Registration
While the process for WAEC GCE Registration 2026 is designed to be user-friendly, candidates often make avoidable mistakes. Being aware of these can save you time, frustration, and potential disqualification:
- Incorrect Personal Details: Entering the wrong name, date of birth, or gender can cause significant issues later, including problems with result collection and certificate issuance. Always cross-reference with your birth certificate and a valid ID.
- Poor Quality Passport Photograph: Blurry, old, improperly sized, or non-compliant photos are a common reason for registration rejection. Ensure your photo meets all WAEC specifications (white background, clear, recent, correct dimensions).
- Choosing the Wrong Subjects: Selecting subjects that do not align with your desired course of study in higher institutions can be a major setback, requiring you to retake the exam. Research university requirements thoroughly before making your choices.
- Late Registration: Procrastination can lead to missing the deadline, facing higher late fees, or encountering technical glitches due to server overload as the deadline approaches.
- Using Unofficial Portals: Always ensure you are on the official WAEC website. Scammers often create fake sites to defraud candidates or collect personal information. Verify the URL carefully.
- Incomplete Payment: Ensure your payment for the registration pin and any other fees is fully processed and you receive a confirmation. Issues with payment can invalidate your registration, even if you’ve filled out the form.
- Not Printing Photo Card/Acknowledgement Slip: These documents are your proof of registration and are mandatory for gaining entry to the examination hall. Failing to print and keep them safe is a critical oversight.
- Ignoring Instructions: Overlooking specific instructions provided on the portal or in the registration guide can lead to errors that are difficult to rectify.
After Registration: What Next?
Once you have successfully completed your WAEC GCE Registration 2026, your focus should shift to preparation. Ensure you have the necessary study materials and a well-structured study plan. Familiarize yourself with the examination timetable once it is released, paying close attention to the dates and times for each of your chosen subjects. Remember that success in the GCE requires dedication, consistent effort, and smart study techniques. Consider joining study groups or seeking tutorial assistance if you need extra support in certain subjects. Utilize past questions extensively to understand the exam format and common question types.
Preparing for the WAEC GCE Exam
Effective preparation is key to excelling in the WAEC GCE. Here are some strategies:
- Create a Study Timetable: Allocate specific times for each subject, ensuring you cover all topics. Be realistic and consistent.
- Use Recommended Textbooks: Adhere to the WAEC syllabus and use textbooks recommended by the council or reputable publishers.
- Practice with Past Questions: This is invaluable. Solving past questions helps you understand the exam pattern, time management, and common areas of focus.
- Form Study Groups: Collaborating with peers can help clarify difficult concepts and provide different perspectives.
- Seek Tutoring: If you struggle with particular subjects, consider engaging a tutor for personalized guidance.
- Maintain a Healthy Lifestyle: Ensure you get enough sleep, eat well, and exercise. A healthy body supports a sharp mind.
Exam Day Guidelines
On the day of your exams, adherence to guidelines is crucial:
- Arrive Early: Be at your examination centre at least 30 minutes before the scheduled start time. This allows for security checks and helps you settle down.
- Bring Essential Documents: Your WAEC GCE photo card and a valid means of identification are mandatory. Without them, you may not be allowed to write the exam.
- Bring Necessary Stationery: Pencils, pens, erasers, mathematical sets, and a non-programmable calculator (if allowed for your subject) are essential.
- Adhere to Rules: Follow all instructions given by the invigilators. Avoid any form of malpractice, as it leads to severe penalties, including cancellation of results.
- Manage Your Time: During the exam, allocate your time wisely to each section and question. Don’t spend too much time on a single difficult question.
Understanding Your Results
After the examinations, WAEC will announce the result release date. You will typically need a scratch card or e-pin to check your results online. Understanding the grading system (A1, B2, B3, C4, C5, C6 for passes; D7, E8, F9 for failures) is important. If you are not satisfied with your results, you may consider applying for a remark (within a specified period) or registering for the next WAEC GCE examination to improve your grades.
For those interested in other WAEC-related updates, you might also find information on the WAEC Recruitment Shortlist 2026 useful.
Frequently Asked Questions (FAQs) about WAEC GCE Registration 2026
Can I register for WAEC GCE if I am still in secondary school?
WAEC GCE is primarily for private candidates. If you are currently enrolled in a secondary school, you would typically register for the May/June WASSCE through your school. However, some individuals might register for GCE to improve specific subject grades or to obtain an additional certificate, provided it doesn’t conflict with their school’s examination schedule.
What happens if I make a mistake during registration?
Minor errors might be correctable through the WAEC correction window, usually announced after the main registration. However, significant errors, especially in names or dates of birth, can be problematic and may require visiting a WAEC office with supporting documents and potentially paying a correction fee. Always review thoroughly before final submission to avoid issues with your WAEC GCE Registration 2026.
Can I change my subjects after registration?
Generally, changing subjects after final submission is difficult and often not permitted once the registration portal closes. This is why careful selection during the initial registration is crucial. Double-check your subject choices before confirming your application.
Is there a specific dress code for the WAEC GCE examination?
While there isn’t a strict dress code, candidates are expected to dress decently and avoid anything that could be distracting or violate examination rules. Focus on comfort and practicality, ensuring your attire does not hinder your ability to focus. Avoid wearing anything that could be perceived as carrying unauthorized materials.
How do I check my WAEC GCE results?
Results are typically checked online using the WAEC result checker portal, which requires a scratch card or e-pin. Details on how to obtain and use these will be provided by WAEC after the examinations. Keep your registration details handy as they might be needed to access your results. You usually enter your examination number, serial number, and PIN.
How long are WAEC GCE results valid?
WAEC GCE results generally have indefinite validity for most purposes, especially for university admissions within Nigeria and other West African countries. However, specific institutions or international bodies might have their own policies regarding the recency of results.
Can I register for WAEC GCE from outside Nigeria?
WAEC GCE is primarily conducted for candidates within Nigeria, Ghana, Sierra Leone, The Gambia, and Liberia. If you are outside these countries, you would need to confirm with the WAEC office in your region or the nearest WAEC international office regarding registration procedures and examination centres.
Are there practical examinations for WAEC GCE?
Yes, subjects like Physics, Chemistry, Biology, Agricultural Science, and some vocational subjects often include a practical component. Candidates registering for these subjects must be prepared for both the theory and practical examinations. The practical exam details will be included in the timetable.
Conclusion
The WAEC GCE Registration 2026 is a straightforward process when approached with careful planning and attention to detail. By following the guidelines outlined in this article, gathering your documents in advance, and adhering to the deadlines, you can ensure a smooth and successful registration. This examination is a vital stepping stone for many, opening doors to higher education and career opportunities. We encourage all prospective candidates to take this process seriously and prepare diligently for their exams. A successful WAEC GCE Registration 2026 is the first step towards achieving your academic aspirations. For more official information and updates, always refer to the official WAEC website.
general post
SMEDAN CGS Portal 2026: How to Apply for ₦50,000 Grant, Eligibility
Looking for a boost for your micro-business? This guide details everything you need to know about the SMEDAN CGS portal 2026, including how to successfully apply for the ₦50,000 grant!

SMEDAN Conditional Grant Scheme (CGS) Portal 2026: How to Apply for the ₦50,000 Grant, Eligibility & Requirements
Nigeria’s economic landscape is significantly shaped by its vibrant micro, small, and medium enterprises (MSMEs). These businesses are the backbone of job creation, innovation, and economic diversification. Recognizing their immense potential and the challenges they face, the Small and Medium Enterprises Development Agency of Nigeria (SMEDAN) has consistently rolled out initiatives aimed at nurturing and empowering them. Among its most impactful programs is the Conditional Grant Scheme (CGS), a lifeline designed to formalize and inject crucial capital into micro-enterprises across the nation.
As we look towards 2026, the SMEDAN CGS portal is anticipated to open its doors once again, offering eligible entrepreneurs a non-refundable grant of ₦50,000. This article serves as a comprehensive guide, meticulously detailing the application process, outlining the essential eligibility criteria, and itemizing the requirements to ensure your application for the SMEDAN CGS 2026 grant is successful. Whether you’re a budding entrepreneur or an existing micro-business owner, understanding these steps is paramount to accessing this invaluable support.
Understanding the SMEDAN Conditional Grant Scheme (CGS)
Before diving into the application specifics, it’s crucial to grasp the foundational aspects of SMEDAN and the CGS itself.
What is SMEDAN?
The Small and Medium Enterprises Development Agency of Nigeria (SMEDAN) was established by the SMEDAN Act of 2003 to promote and facilitate the development of the MSME sector in Nigeria. Its mandate encompasses:
- Policy Formulation: Advising the government on policies conducive to MSME growth.
- Capacity Building: Providing training, mentorship, and business development services.
- Access to Finance: Linking MSMEs with funding opportunities, including grants and loans.
- Advocacy: Representing the interests of MSMEs at various levels.
- Data Collection & Research: Building a comprehensive database of MSMEs to inform interventions.
SMEDAN plays a pivotal role in creating an enabling environment for small businesses to thrive, contributing significantly to poverty alleviation, wealth creation, and sustainable economic development in Nigeria.
What is the Conditional Grant Scheme (CGS)?
The Conditional Grant Scheme (CGS) is one of SMEDAN’s flagship programs, specifically designed to formalize and support micro-enterprises. The scheme aims to:
- Formalize Businesses: Encourage unregistered micro-businesses to formalize their operations by registering with SMEDAN and, subsequently, the Corporate Affairs Commission (CAC). This formalization opens doors to greater opportunities, credibility, and access to financial services.
- Provide Financial Support: Offer a one-off, non-refundable grant of ₦50,000 to selected beneficiaries. This capital injection is intended to help these businesses scale, acquire essential equipment, purchase inventory, or improve their operational efficiency.
- Build Capacity: Equip entrepreneurs with essential business management skills through mandatory training programs. This ensures that beneficiaries not only receive financial aid but also possess the knowledge to utilize it effectively and sustain their businesses.
The “conditional” aspect of the grant is critical. It implies that beneficiaries must meet certain conditions, such as undergoing training and potentially formalizing their business, to receive and retain the grant. This structured approach ensures that the support provided yields tangible and sustainable results for the micro-enterprises.
Key Benefits of the SMEDAN CGS Grant
Receiving the SMEDAN CGS grant extends beyond the immediate financial relief. It offers a multifaceted package of benefits that can significantly impact a micro-enterprise’s trajectory:
- Direct Financial Injection: The ₦50,000 grant provides crucial working capital, enabling businesses to purchase raw materials, upgrade tools, expand inventory, or cover operational costs. For many micro-enterprises, this sum can be a game-changer.
- Business Formalization: The CGS encourages and often facilitates the registration of businesses with SMEDAN (obtaining a Unique Identification Number – UIN) and the Corporate Affairs Commission (CAC). Formalization enhances credibility, allows access to government contracts, and makes it easier to secure further funding or partnerships.
- Capacity Building and Training: Beneficiaries typically undergo mandatory entrepreneurship training. This training covers vital areas such as financial management, marketing, business planning, and customer service, equipping owners with the skills needed to manage and grow their businesses sustainably.
- Enhanced Credibility and Visibility: Being a SMEDAN-certified and CGS-supported business adds a layer of credibility. This can improve customer trust, open doors to new markets, and potentially attract further investment.
- Access to SMEDAN Ecosystem: Once registered with SMEDAN, businesses become part of a larger ecosystem, potentially gaining access to other SMEDAN programs, mentorship opportunities, and networking events.
- Economic Empowerment: By supporting individual micro-enterprises, the CGS contributes to local economic development, job creation, and poverty reduction at a grassroots level.
Eligibility Criteria for the SMEDAN CGS 2026
To be considered for the SMEDAN CGS 2026 grant, applicants must meet specific criteria. These criteria are designed to ensure the grant reaches those who need it most and can utilize it effectively. While specific details for 2026 will be officially announced by SMEDAN, based on previous cycles, the following are generally required:
Who Can Apply?
- Nigerian Citizenship: Applicants must be Nigerian citizens residing and operating their businesses within Nigeria.
- Age Requirement: Generally, applicants must be at least 18 years old.
- Micro and Small Business Owners: The scheme primarily targets owners of micro-enterprises. A micro-enterprise is typically defined by SMEDAN as a business with fewer than 10 employees and an asset base (excluding land and building) of less than ₦5 million. Small enterprises might also be considered, but the focus is heavily on the micro-segment.
- Operational Business: The applicant must own and operate an existing business. The CGS is not typically for business ideas or startups in their conceptual phase, but rather for businesses that are already operational, even if on a small scale.
- Specific Sectors (Often Prioritized): While not exclusively limited, SMEDAN often prioritizes businesses in key sectors that contribute significantly to local economies and food security, such as:
- Agriculture and Agro-allied processing
- Manufacturing and Craftsmanship
- Fashion and Tailoring
- Food processing and Catering
- Services (e.g., hairdressing, barbing, small repairs)
- Trading (retail of essential goods)
- No Prior CGS Beneficiary Status: To ensure wider reach and impact, individuals who have previously benefited from the SMEDAN CGS grant are typically not eligible to apply again.
Business Status Requirements
- SMEDAN Registration (UIN): Applicants must be registered with SMEDAN and possess a valid Unique Identification Number (UIN). This is a fundamental requirement for most SMEDAN programs. If you don’t have one, you’ll need to obtain it before applying.
- Willingness to Formalize (CAC): While not always a prerequisite for initial application, successful beneficiaries are often required to register their business with the Corporate Affairs Commission (CAC) if they haven’t already. This is a key “condition” of the grant, promoting formalization.
- Willingness to Undergo Training: A crucial condition for receiving the grant is the applicant’s commitment to participate in and complete any mandatory entrepreneurship training organized by SMEDAN.
Essential Requirements for a Successful Application
Having met the eligibility criteria, the next step is to gather all necessary documents and prepare for the application process. A complete and accurate application significantly increases your chances of selection.
Documentation Needed
Ensure all documents are clear, legible, and scanned in the appropriate formats (usually JPEG or PDF) as specified on the portal.
- Valid Means of Identification:
- National Identity Card (NIN)
- Driver’s License
- Voter’s Card
- International Passport
- Passport-Sized Photograph: A recent, clear passport photograph with a white or off-white background.
- Proof of Business Existence:
- Clear photographs of your business premises (shop, stall, workshop).
- Pictures of your products or services in operation.
- Evidence of sales or customer interaction (if available).
- A brief description of your business operations, products/services, and target market.
- SMEDAN Unique Identification Number (UIN) Certificate: This is generated upon successful registration with SMEDAN.
- Bank Account Details:
- A valid bank account in your name. While personal accounts are sometimes accepted for micro-businesses, a business account is preferred if available. The account must be active and correctly linked to your BVN.
- Bank Verification Number (BVN).
- Business Plan/Description: A concise document or statement outlining:
- Your business name and address.
- The products or services you offer.
- Your target customers.
- How you currently operate.
- How the ₦50,000 grant will specifically be used to grow your business (e.g., “to buy a new sewing machine,” “to purchase more stock of fabric,” “to expand my poultry farm”).
- Corporate Affairs Commission (CAC) Registration Certificate (Optional but Advantageous): If your business is already registered with CAC, having the certificate ready is a plus. If not, be prepared to register if selected.
- Proof of Address: A utility bill (electricity, water) or a tenancy agreement showing your residential address.
Technical Requirements
- Internet-Enabled Device: A computer, laptop, or smartphone with stable internet access.
- Valid Email Address: An active email address that you check regularly, as all communications from SMEDAN will likely be sent there.
- Active Phone Number: A reachable mobile phone number for SMS notifications and calls.
Step-by-Step Guide: How to Apply for the SMEDAN CGS 2026 Grant
Applying for the SMEDAN CGS grant involves several stages, from pre-application preparation to the final disbursement. Following these steps diligently will streamline your application process.
- FRSC Shortlisted Candidates 2026: Check Names, Screening & Next Steps
- WAEC Recruitment Shortlist 2026 Out: Check Your Name & Next Steps
Phase 1: Pre-Application Steps
These steps should be completed even before the official CGS portal for 2026 opens.
Step 1: Obtain Your SMEDAN Unique Identification Number (UIN)
This is a mandatory first step for virtually all SMEDAN programs.
- Visit the SMEDAN MSME Registration Portal: Go to the official SMEDAN website (e.g.,
msme.smedan.gov.ngor the specific registration link provided by SMEDAN). - Register Your Business: Follow the prompts to register your micro-enterprise. You will need to provide personal details, business information (name, sector, number of employees, assets), and contact information.
- Receive Your UIN: Upon successful registration, you will be issued a unique identification number (UIN) and a certificate. Download and save this certificate carefully. If you already have a UIN, ensure it’s up-to-date.
Step 2: Prepare Your Business Plan/Description
While not a formal, lengthy business plan, you need a clear understanding and articulation of your business.
- Outline Your Business: Write down your business name, what products or services you offer, who your target customers are, where you operate, and how long you’ve been in business.
- State Grant Utilization: Crucially, clearly articulate how the ₦50,000 grant will specifically be used to improve or expand your business. Be specific (e.g., “to buy a new industrial sewing machine,” “to purchase 20 bags of feed for my poultry,” “to stock my provision shop with essential goods”).
Step 3: Gather All Required Documents
Refer to the “Essential Requirements” section above and ensure you have all documents ready.
- Scan Documents: Scan all physical documents (ID, passport photo, UIN certificate, CAC certificate if applicable, utility bill) into clear digital files (JPEG or PDF).
- Organize Files: Create a folder on your computer or phone to store all scanned documents, clearly labeled for easy access during the application.
- Check File Sizes: Ensure your scanned documents meet any specified file size limits on the portal.
Phase 2: Online Application Process (Portal)
This phase begins when SMEDAN officially opens the CGS 2026 application portal. Stay alert for official announcements.
Step 4: Visit the Official SMEDAN CGS Portal (2026)
- Official Link: Always use the official link provided by SMEDAN through their website, social media channels, or reputable news outlets. Be wary of unofficial links or phishing scams. The link will typically be announced closer to the application opening date.
- Check for Authenticity: Ensure the website address is correct and secure (starts with
https://).
Step 5: Create an Account or Log In
- New Applicants: If you’re a first-time applicant to the CGS portal, you’ll likely need to create a new account using your email address and a strong password. You may need to verify your email.
- Existing SMEDAN Users: If you’ve used other SMEDAN portals, you might be able to log in with your existing credentials or your SMEDAN UIN. Follow the portal’s specific instructions.
Step 6: Fill Out the Application Form
The online form will typically be divided into several sections:
- Personal Details: Your full name, date of birth, gender, marital status, state of origin, residential address, phone number, email, and BVN.
- Business Details:
- Your SMEDAN UIN.
- Business name, address, local government area, state.
- Business sector (e.g., agriculture, fashion, services).
- Type of business (e.g., sole proprietorship).
- Number of employees.
- Years in operation.
- Annual turnover (estimate for micro-businesses).
- CAC registration number (if applicable).
- Grant Purpose: This is where you detail how you intend to use the ₦50,000 grant. Be concise, clear, and align it with your business growth.
- Bank Details: Provide your bank name, account number, and account type. Ensure this matches your BVN.
Step 7: Upload Required Documents
- Follow Instructions: Carefully follow the portal’s instructions for uploading each document. Ensure you upload the correct document to the designated field.
- File Formats and Sizes: Pay attention to specified file formats (e.g., JPEG, PDF) and maximum file sizes.
- Clarity: Ensure all uploaded documents are clear and legible.
Step 8: Review Your Application
This is a critical step.
- Thorough Check: Before submitting, review every section of your application form. Check for typos, incorrect dates, mismatched information, and ensure all fields are completed.
- Document Verification: Confirm that all documents have been successfully uploaded and are the correct ones.
- Accuracy: Ensure all information provided is accurate and truthful. Discrepancies can lead to disqualification.
Step 9: Submit Your Application
- Final Click: Once you are confident that everything is accurate and complete, click the “Submit” button.
- Confirmation: You should receive an on-screen confirmation message and possibly an email confirming your submission. Keep a record of any application ID or reference number provided.
Phase 3: Post-Application Steps
After submitting your application, the process moves to SMEDAN’s internal review.
Step 10: Await Selection Notification
- Patience: The review process can take several weeks or even months, depending on the volume of applications.
- Official Communication: SMEDAN will contact shortlisted candidates directly via the email address and phone number provided in the application. Do not rely on unofficial sources for updates.
Step 11: Participate in Mandatory Training
- Invitation: If shortlisted, you will be invited to participate in a mandatory entrepreneurship training program. This training may be conducted physically at designated centers or virtually.
- Attendance is Key: Full participation and successful completion of this training are usually conditions for receiving the grant. It’s an opportunity to gain valuable business insights.
Step 12: Grant Disbursement
- Verification: After successful completion of the training and any final verification checks, the ₦50,000 grant will be disbursed directly into the bank account you provided in your application.
- No Cash Payments: SMEDAN typically disburses funds electronically. Beware of any requests for cash payments or processing fees.
Important Considerations and Tips for Applicants
To maximize your chances of success, keep the following in mind:
- Start Early: Don’t wait until the last minute. Begin gathering documents and completing your SMEDAN UIN registration as soon as possible.
- Accuracy and Honesty: Provide truthful and accurate information. Any false declaration can lead to immediate disqualification.
- Professionalism: Ensure your scanned documents are clear and your business description is well-articulated.
- Stable Internet: Use a reliable internet connection to avoid interruptions during the application process.
- Beware of Scams: SMEDAN will never ask for money to process your application, training, or grant disbursement. Any such request is fraudulent. Report it immediately.
- Follow Instructions Strictly: Adhere to all guidelines regarding document formats, file sizes, and information required.
- Monitor Official Channels: Regularly check the official SMEDAN website (
www.smedan.gov.ng) and their verified social media pages for updates and announcements regarding the CGS 2026.

Recommended Ad Networks for Websites: Boost Your Site’s Revenue

Top Web3 Startups to Watch in 2026

Adam Foroughi Biography: AppLovin CEO, Career, Education & Net Worth

Lucy Guo Biography: Scale AI Co-Founder, Passes CEO, Career & Net Worth.

Coding Bootcamps vs Computer Science Degrees: Which Offers Better Career Opportunities?

Liang Wenfeng: DeepSeek Founder Biography, Career, Education, and AI Impact

Tech Internship vs Fellowship: Which Builds Stronger Career Experience?

AI Research Scholarships vs Blockchain Fellowships: Which Has Better Future Opportunities?

Content AI 2.0: AI SEO Power Directly Inside WordPress

Web3 Staff Data Engineer Job: $400k-$500k Salary

Pixel 11 Pro XL Review: HiLight Is Its Most Disappointing New Feature

How to Make $1000 in a Day: Quick & Easy Methods

Samsung Galaxy S26 FE: Release Date Set for Next Week

Digital Training Academy 2026: FG Opens Portal for 36,000 Nigerians
WAEC GCE Registration 2026: Form, Fee, Closing Date & How to Register Online
Lucy Guo Biography: Scale AI Co-Founder, Passes CEO, Career & Net Worth.
Adam Foroughi Biography: AppLovin CEO, Career, Education & Net Worth
Liang Wenfeng: DeepSeek Founder Biography, Career, Education, and AI Impact
Coding Bootcamps vs Computer Science Degrees: Which Offers Better Career Opportunities?
Tech Internship vs Fellowship: Which Builds Stronger Career Experience?
Recommended Ad Networks for Websites: Boost Your Site’s Revenue
Top Web3 Startups to Watch in 2026
How to Make $1000 in a Day: Quick & Easy Methods
Digital Training Academy 2026: FG Opens Portal for 36,000 Nigerians
AI Research Scholarships vs Blockchain Fellowships: Which Has Better Future Opportunities?
Samsung Galaxy S26 FE: Release Date Set for Next Week
Pixel 11 Pro XL Review: HiLight Is Its Most Disappointing New Feature
Content AI 2.0: AI SEO Power Directly Inside WordPress
Web3 Staff Data Engineer Job: $400k-$500k Salary
-
 general post7 months ago
Semantics Ideas: Meaning, Types, and Examples Explained
-
 Tech Leaders & Biographies7 months ago
Hidden Costs of OpenAI API: 5 Things That Spike Your Bill
-
 general post9 months ago
NAFDAC Registration Guide for Nigerian Products in 2025
-
 general post2 years ago
Death of The of VTU Services in Nigeria: Causes, Implications, and Solutions
-
 Tech Leaders & Biographies7 months ago
Artificial Intelligence Transforming Global Economy in 2026
-
 Software2 years ago
How to Create a WebView App with a Website for Free and No Coding Knowledge
-
 Tech Leaders & Biographies7 months ago
Sidra Chain KYC Guide 2026: Step-by-Step Identity Verification on Blockchain
-
 Tech Leaders & Biographies7 months ago
Best Accredited Online Blockchain Certification Programs for 2026 US Careers
-
 Software8 months ago
Blogger Radio App v4.0.0 – Blogger API Free Download
-
 Tech Leaders & Biographies8 months ago
1000+ Free Backlinking Sites: Ultimate SEO Gem for Ranking